Showing posts with label Creative Recycling. Show all posts

Saturday, April 20, 2013

Too Much Pinterest Can Be A Good Thing, Right?


I'm a Pinterest junkie.
...not like it was a really big secret or anything...

This week was one of those 'actually-make-what-you've-pinned' weeks.

And everything was super successful.
...well, almost everything...


Monday, however, was a work day...not a pinterest day. 
I got a lot done.

Like this...
Photo: Like and Share if you LOVE yellow, gray and white together!

And this...
Photo: Another custom 
Order going out today...
A burnt orange bouquet.

And these...


****************************

Tuesday I mostly drooled over things I want to do, like make my own yogurt. 


And kefir soda


I finally got the guts to order both yogurt and kefir cultures.
They should be here next week.
Yay!


****************************

Wednesday I cleaned our washing machine.
The inside.
The outside too, but the inside is what really needed it.

I followed this step-by-step guide and it worked like a charm:
clean-your-washer-1.22.13


Then I re-organized our coat closet.
Ok, this one was kind of a fail.

 Here is my inspiration closet:
{source}

But I decided that since we'll likely not be here for another year, I'm not going to put a lot into this house.
So, I assembled a metal shelf inside the closet and in the process pinched the crap out of my leg while assembling said shelf. 
But I did not cuss!
...so I guess it kind of was a success...


After lunch I was the parent reader for Rowan's preschool class.
We read a Diego and Dora book and Polar Bear, Polar Bear What Do You Hear?


When we got home Rowan and I made some yummy looking granola bars.
...Mmmmm...

I used this recipe:
granola bar recipe


They were waaaaay too sweet...which, coming from a woman with a mouthful of sweet teeth, is saying something. Next time I make this I'm gonna swap out the brown sugar for about half the amount in maple syrup.
And maybe add some coconut.
And chocolate.


****************************


Thursday was another work day.
I did a fair amount of prep work to finish some orders.
...like these corsages...
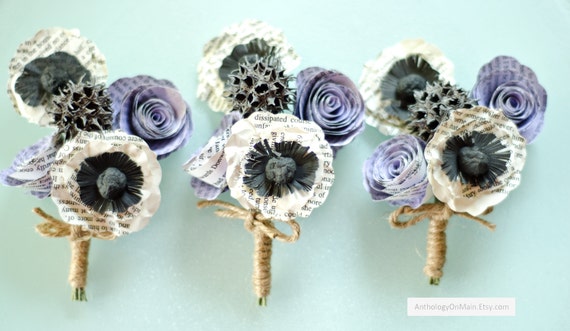
Jane Austen Corsage - Eco Friendly Book Page Flower Corsage for Wedding Party, Guests, Prom - Customized to Your Colors


It was also really cold.
Which made for a perfect day to cuddle up on the couch with some coffee and surf Pinterest.

But it was not a good day for cleaning.
So I didn't.


Cold days are also good for mixing plaids, florals, and stripes.


****************************


Friday I realized that not cleaning on Thursday was a bad idea.
So I cleaned.

AND!!!
My yogurt and kefir cultures came early!!!

Rowan was eager to help me make yogurt, which she probably won't eat.
I bought the kind of cultures that are mild, are so easy to make a caveman could do it, and are heirloom {meaning you can forever make yogurt from the previous batch}.

We have another 24 hours for it to do it's thing.
I'll let you know if I'm as smart as a caveman next week.


****************************


Saturday (today) has been a lazy day.
Sort of.

I've been working REALLY hard on making a photo book.
See, I have this grand plan to make one photo book for each year of our kids life...for each of them.
...it's sparked from the guilt of being a horrible scrapbooker/baby book keeper when they were babies.

Here's a page I have done:


Oh, and I found this super cool way to repurpose a crib when your babies are grown...
{it's a chicken coop}


Monday, March 15, 2010

Creative Recycling: Bowling with Pop Bottles


I've been wanting to make this game for a while now and I finally got around to doing it! As you can see, it's pretty darn simple.

All I used was 10 pop bottles, some paper, tape and a marker.
I cut paper strips to the correct width (to fit inside the groove of the bottle), then taped each end to the bottle and finally wrote numbers on the front.

If you wanted to make it prettier, you could decorate it with colored tape or even papier mache each bottle into the shape of a blowing pin!

And, of course, you'll need a bowling ball - we used a ball we already had.


Both kids really like this "new" game. Breck lines up the bottles instead of making the bowling triangle. And Rowan skips the ball altogether and opts to knock down the bottles with her foot.
Sometimes I have Breck hand me the bottles in 1-10 order, but not often - I want to keep this game as fun as possible.

Friday, May 1, 2009

Creative Recycling in the Garden


The following items can be repurposed in the garden - saving you time weeding and watering - all while being environmentally friendly!

Paper plates and coffee filters
Reuse slightly used paper plates and new coffee filters as weed blockers! Cut in from the edge and make a hole in the center. Then wrap the plate/filter around your plant!

Milk jugs and 2L soda bottles
Both of these can be used as extra protection for plants. Simply cut the bottoms from the jugs and place over your small plants. To keep them from blowing away, poke holes in the sides and stake down with wire hangers cut long enough to shape as a hairpin.

Use soda bottles as a watering conservation system. Poke 3 or 4 holes down one side. Bury the bottle up to the bottom of it's spout, making sure to positon the holes toward where the plant will be. Use a funnel to fill the bottles with water and/or fertilizer.

Toilet paper and paper towel tubes
Use these as seed starting pots! Cut each 'pot' to about 2 or 3 inches tall. Place on an old baking sheet, fill with soil and plant your seeds. When seedlings are ready to plant, push the plant down through the ring slightly (about an inch) and plant your seedling with the ring around it. The buried part of the ring with act as protection against cutworms and the upper part serves as protection for the seedling.

Newspaper
This can be a great timesaver for weeding! Dedicate some time before you plant to bury several thicknesses of newspaper in the pathways of your garden. This will keep weeds out and water in. And in a year or two the newspaper will decompose, making it a much more Earth-friendly alternative to plastic.

Use newspaper to make Biodegradable Plant Pots - this is probably a bit late, since most seedlings should have already been started by now, but better late than never!

Old t-shirts and pantyhose
Reuse these for tying up plants. They will hold the plant, yet stretch just enough to not damage the plant.

Space saving tips:
*Plant pole beans in a spiral - use heavy wire fencing as your trellis.
*Use your chain-link fence as a trellis for vining plants.

Here are some helpful sites for gardening and canning:

Better Homes and Gardens - Gardening site
Home Preservation
USDA - Gardening

Friday, March 20, 2009

Creative Recycling: Diaper Boxes


I'm the first to admit that this is not a very stylish "shelf" but it's free and gets the job done. I'm using ours as a "catch-all" kind of shelf, but it would work great as a shoe rack, bookshelf or for any other smallish items you need to store!

All I did was fold the top flaps back and tape them to the outside of the box for added stability. If you had time and were feeling extra ambitious, you could certainly jazz it up a bit by adding fun contact paper or spray gluing scrapbook paper around the inside.

Thursday, February 26, 2009

Creative Recycling: Fused Plastic Bags

I saw this craft and thought it'd be fun to try. And since I had all the supplies on hand, I figured I'd give it a go! I followed this tutorial and it went pretty smoothly. Now I just have to decide what to make with my few sheets! ...I'm thinking they would make good liners for totes or a beach bag this summer!

I cut out some shapes using the colorful plastic from diaper packages


Here are my two test pieces. The blue plastic is what our newspaper comes in when it's rainy, but it didn't fuse as nicely as I'd hoped. I mainly used Walmart and Walgreens bags, since they are predominantly white.


...I'm still figuring out the best setting on our iron.

Tuesday, February 24, 2009

Cookie Cutter Crayons!

I know this post has been a long time coming, but we finally got around to making these today! I originally saw the idea on Daily Danny.

We didn't have a ton of "naked" crayons (ones without their wrappers) so I had the fun task of unwrapping a bunch. My nails had taken enough abuse after about 15 crayons, so we only had enough to make two cut-outs.


I used my mini-loaf pan and covered each loaf spot with a double-layer of aluminum foil.


Then Breck filled them with our naked, broken crayons.


We baked it at 250 degrees for 10 minutes, then set aside for about another 15 minutes.


They were warm when we pulled them out of the loaf pan, but firm enough to cut with our cookie cutter.


After they were cut, I let them set until they were no longer warm to the touch. Then Breck gave 'em a go! I think these are easier for him to hold, not to mention exciting since the colors keep changing!

Tuesday, February 3, 2009

Our CD Fish


Remember a few days ago when I told you about recycling those TaxCut CDs? (although it works for any unwanted CDs....we just happen to have a bunch of tax software mailed to us.) Well, yesterday 'we' made the fish!

Materials Needed:
Colored Paper
2 CDs
string
scissors, paper punch
glue
buttons or google eyes


I cut out all the required parts:
2 top fins, 1 bottom fin, 2 side fins, a tail, and the mouth.


Then I cut/punched out some details to give it a little pizazz!:
(2) outline for the mouth, (2) stripe for the top fin, paper punched circles for the tail, and buttons for the eyes.


Then we glued on all the parts to the printed side of the CD and added our string, which we sandwiched between the two top fins. (Breck was eager to glue on the side fin!)


Now glue the other CD, printed side down, to the first CD. After that dries, add your side fins and eyes!


(I don't recommend this craft for kids with short attention spans - like mine. I ended up doing pretty much all of it myself.)

Saturday, January 31, 2009

Creative Recycling: Baby Food Jars

1. Seed starters/small plant pots


Breck got a wildflower seed thing with his movie The Jungle Book, so we planted that - and since there's minimal direct light in our house, I have very low expectations of anything actually growing.


These are my (severely neglected) aloe off-shoots. They needed repotting, so I thought I'd give this a try! I think they look kinda cute in their own tiny jars!


And that's all I got around to doing! I had plans to make several things, but it didn't happen.
There are, however, several more ideas at re-nest.com, which I recommend you check out - some of them are pretty neat. (and there are pictures!)

My favs from the above site are the pin cushion and garden walkway!


Friday, January 30, 2009

Creative Recycling: Don't Throw Away that TaxCut CD!


Raise your hand if you recently got one (or more) of these CDs in your mailbox. Don't chuck 'em just yet! Here are a few ideas to reuse and upcycle this junk mail!

1. Assuming your case arrived in good condition, remove the cover and use it to replace a broken DVD case! (if you have a toddler who gets their little mitts on DVDs, like ours, then I'm guessing you have plenty of broken cases!)

2. Cover the printed side of the CD with scrapbook paper (or any other kind of paper, really) and turn into a small clock!

3. Turn the CD into a fish! (this is one we will do - it's very simple and we already have all the supplies!)


Have another TaxCut CD recycling idea? Post it in a comment and I'll add it to the list!


Friday, January 9, 2009

Creative Recycling: Magazine Holders

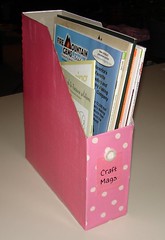
Here's a very easy tutorial on how to make your own magazine holders from cereal boxes!


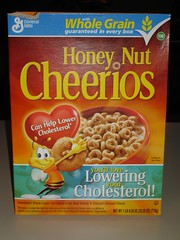
Step 1. Start with a large cereal box and gather your supplies.
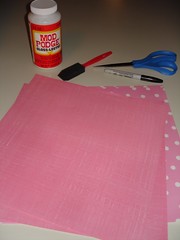
(I used the largest box size you can buy at the store - the smaller boxes weren't big enough to hold my mags! You'll also need glue, a brush for your glue, scissors, a marker or pen/pencil and pretty paper!)


Step 2. Guesstimate your cut lines!
I used a Family Fun magazine as my guide and my straight edge.
(I think they would have wanted it that way.)

I added an extra 1/2 inch or so in height over my magazine and guessed the rest.


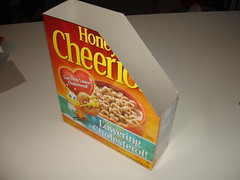
Step 3. Cut the box!
I didn't use a ruler for measuring - I just eyeballed it, but feel free to measure away!


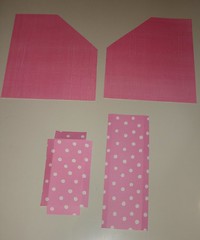
Step 4. Cut your paper to size!
For this step, I simply traced around each side of my mag holder, marking on the wrong side of my paper, then cut them all out. I also cut the back panel slightly wider than needed and cut the front panel slightly wider and taller than needed, so I could wrap them around the sides for a cleaner look. As you can see, I creased the sides to make my lining up and gluing down easier. Oh, and I notched out the corners on my front piece, since it overlaps the top and bottom as well.


Step 5. Glue and decorate!
Now it's time to glue on your pieces to the corresponding sides. I started with my front and back pieces, then glued my side pieces. After it was sort of dry (I recommend waiting until it's really dry, but I'm impatient.) I went over the whole thing with a coat of mod podge. I also added a front label using a scrap piece from my side paper and added a button for a little cuteness!
I didn't bother papering the inside, but you certainly could do that to give it a bit nicer look!

Monday, January 5, 2009

Creative Recycling: Shrinky Dinks!

Remember those awesome little crafts called Shrinky Dinks when you were little?!?! Well, Wendy at Wisdom of the Moon posted a quick little tutorial for making them using #6 plastics! I tried it just today and it worked awesomely! I'd like to say that I did this with Breck, but to be honest - this craft was just for me!


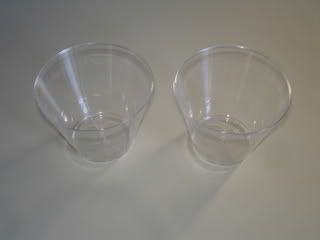
Here's a #6 plastic cup:

it does NOT work - the plastic doesn't cut well - it just cracks. :(


Here's a #6 plastic take out box:

it DOES work!

You can easily cut it with scissors, but on this particular kind, there's a very small surface you're able to work with:


So, I was able to get 2 Shrinky Dinks out of my to-go box. I used a paper punch to make my holes at the top of each.


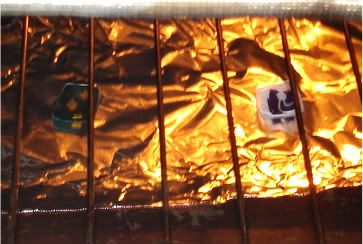
Here's what they look like during baking:

I baked them at the suggested 325 degrees and it took mine almost exactly 2 minutes to finish. They curl up while baking but truely do flatten back out. I started watching mine with the door slightly ajar at the 1 minute mark.


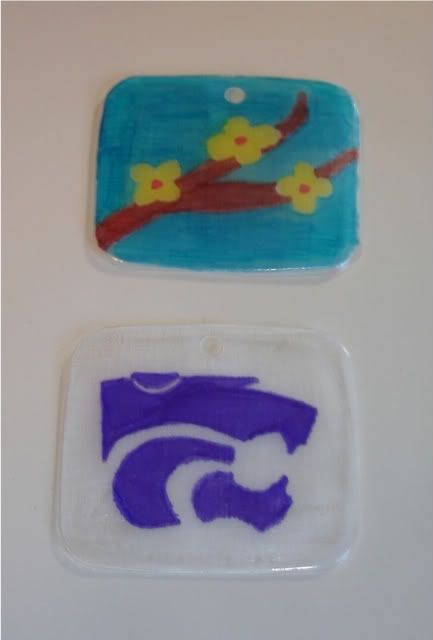
And here's what they look like after!:


...now I just have to figure out what to do with them! ;)

Sunday, December 21, 2008

Creative Recycling: Christmas Card Gift Tags


If you're like me, you save all the Christmas cards you receive and then feel guilty throwing them away once the season is over. (But know that if you don't, you'll turn into your pack-rat grandma!)

Instead of tossing them, use them as gift tags! Simply cut off the front, write your To's and From's on it, then tape it on or punch a hole in one corner and tie with ribbon onto your gift!

Monday, December 15, 2008

Creative Recycling: Scrapbooking with Wrapping Paper

This week's recycling idea is incredibly simple: reuse fun wrapping paper in your scrapbook!

I love wrapping paper - there are sooo many different styles! And not all of it screams Christmas time, so save it and add an eco-thrifty sparkle to your scrapbook projects!

Monday, December 8, 2008

Creative Recycling: Wrapping Paper Confetti

I thought it would be fitting to have this month's Creative Recycling item be something that we know we'll have an excess of very soon: wrapping paper and all the miscellaneous trimming that come with it!

Some of you may already unwrap your gifts ever so neatly in order to reuse the wrapping next year - and that's great! But if you want some immediate and crafty uses, stay with me! :)


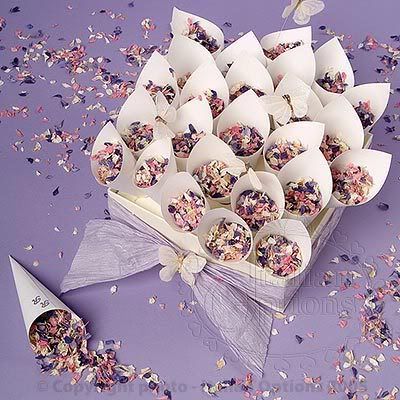
This week's idea is to turn your wrapping paper into New Year's confetti! It's pretty simple: run your wrapping paper through the shredder and then cut into small shapes using regular or decorative scissors! Wallah - New Year's confetti!

Sunday, November 30, 2008

Creative Recycling: Capri Sun Lunchbag

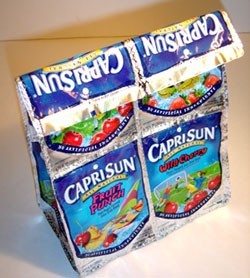
Breck's love of Capri Sun has finally waned and that leaves me with little to no juice pouches for crafts!!! But, I found a tutorial for making a lunchbag over at Thrifty Fun!


(photo and tutorial by Stella Rivet at Thrifty Fun)

LinkWithin

Related Posts with Thumbnails