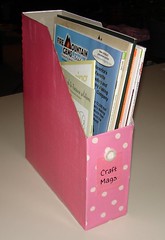
Here's a very easy tutorial on how to make your own magazine holders from cereal boxes!
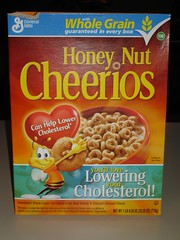
Step 1. Start with a large cereal box and gather your supplies.
(I used the largest box size you can buy at the store - the smaller boxes weren't big enough to hold my mags! You'll also need glue, a brush for your glue, scissors, a marker or pen/pencil and pretty paper!)
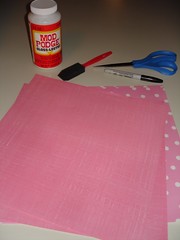
Step 2. Guesstimate your cut lines!
I used a Family Fun magazine as my guide and my straight edge.
(I think they would have wanted it that way.)
I added an extra 1/2 inch or so in height over my magazine and guessed the rest.

Step 3. Cut the box!
I didn't use a ruler for measuring - I just eyeballed it, but feel free to measure away!
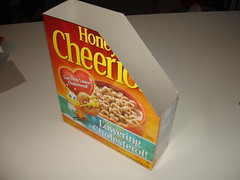
Step 4. Cut your paper to size!
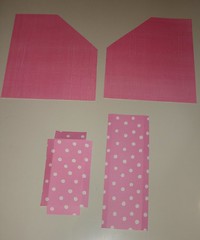
For this step, I simply traced around each side of my mag holder, marking on the wrong side of my paper, then cut them all out. I also cut the back panel slightly wider than needed and cut the front panel slightly wider and taller than needed, so I could wrap them around the sides for a cleaner look. As you can see, I creased the sides to make my lining up and gluing down easier. Oh, and I notched out the corners on my front piece, since it overlaps the top and bottom as well.
Step 5. Glue and decorate!
Now it's time to glue on your pieces to the corresponding sides. I started with my front and back pieces, then glued my side pieces. After it was sort of dry (I recommend waiting until it's really dry, but I'm impatient.) I went over the whole thing with a coat of mod podge. I also added a front label using a scrap piece from my side paper and added a button for a little cuteness!
I didn't bother papering the inside, but you certainly could do that to give it a bit nicer look!


Step 1. Start with a large cereal box and gather your supplies.
(I used the largest box size you can buy at the store - the smaller boxes weren't big enough to hold my mags! You'll also need glue, a brush for your glue, scissors, a marker or pen/pencil and pretty paper!)


Step 2. Guesstimate your cut lines!
I used a Family Fun magazine as my guide and my straight edge.
(I think they would have wanted it that way.)
I added an extra 1/2 inch or so in height over my magazine and guessed the rest.

Step 3. Cut the box!
I didn't use a ruler for measuring - I just eyeballed it, but feel free to measure away!

Step 4. Cut your paper to size!
For this step, I simply traced around each side of my mag holder, marking on the wrong side of my paper, then cut them all out. I also cut the back panel slightly wider than needed and cut the front panel slightly wider and taller than needed, so I could wrap them around the sides for a cleaner look. As you can see, I creased the sides to make my lining up and gluing down easier. Oh, and I notched out the corners on my front piece, since it overlaps the top and bottom as well.

Step 5. Glue and decorate!
Now it's time to glue on your pieces to the corresponding sides. I started with my front and back pieces, then glued my side pieces. After it was sort of dry (I recommend waiting until it's really dry, but I'm impatient.) I went over the whole thing with a coat of mod podge. I also added a front label using a scrap piece from my side paper and added a button for a little cuteness!
I didn't bother papering the inside, but you certainly could do that to give it a bit nicer look!

Hi Katie- I am a friend of Chandra's in CT! Thanks for the great Del Monte information. That is what got me following your blog! I like this craft a lot, it is just what I need to do write now. I wanted to add two things. One is that wallpaper or borders work great and are durable. Second, you mentioned the size box you used by weight. It would be more helpful to list the measurements of the box, as different cereals have different volumes. For example, I have a Rice Chex box that I think is roughly the same size as your Honey Nut Cheerios box, but beceause Chex are much lighter and less dense, the box is only 19 oz. This might confuse some readers. Thanks for what you do and enjoy your lovely family!
ReplyDeleteMonica in CT