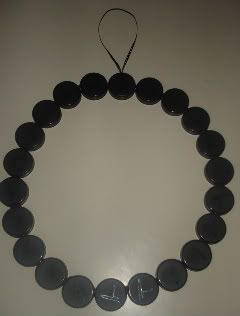
Step 1: Make Your Wreath Base
Arrange bottle caps in a circle. (I used all Powerade caps, as they are black - this is a Halloween wreath after all!) Using a glue gun, glue cap edges together, one by one. The less you disrupt the circle of unglued caps, the easier it will be to end up with a circle shape and not something that looks nothing like a circle....like I almost did!
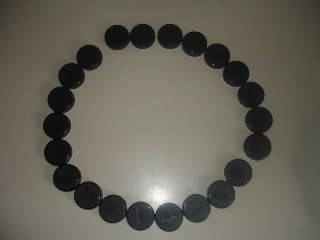
(A note: Egg cartons make a great 'mat' for setting your glue gun on)

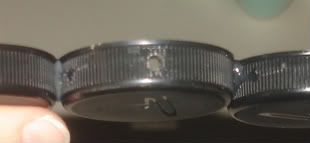
Step 2: Drill A Hole
Once your caps are all glued together and the glue is dry, drill a small hole in the edge of one cap for your ribbon. This will be how your wreath is hung. I used a 1/8" drill bit, but you may need a different size depending on the size of your ribbon.
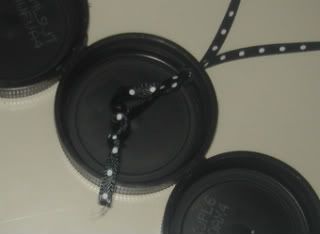
Step 3: Thread Your Ribbon
Decide how long you want the hanger to be. Mine is approximately 6", so I cut my total ribbon length to about 12". Now that your ribbon is cut, thread it through the drilled hole. Tie a knot in the ribbon, making sure that the knot won't slip through the hole.
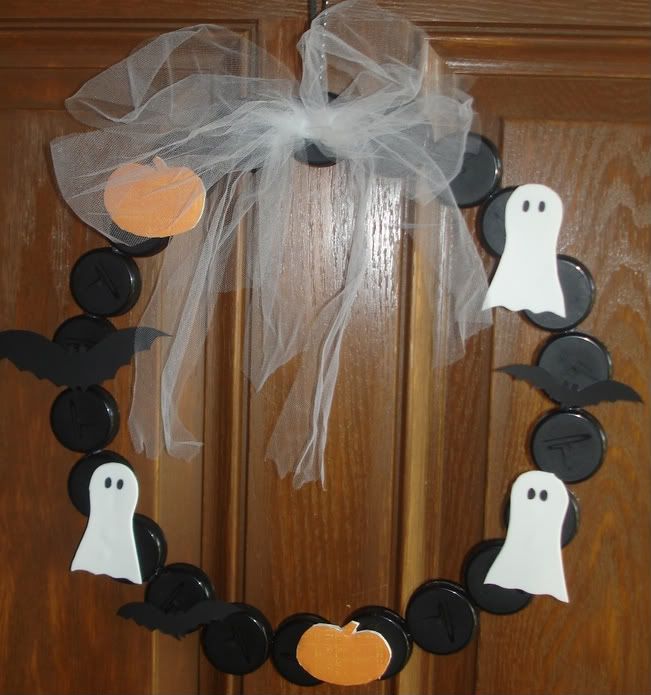
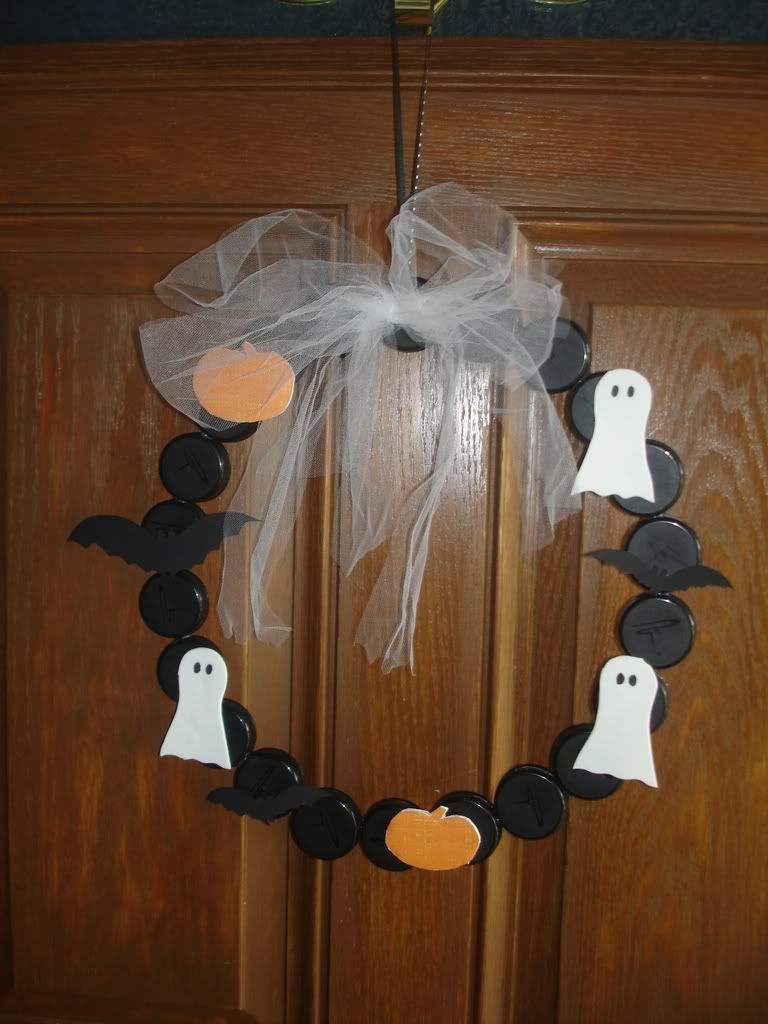
Step 4: Decorate!
Here's where you can take creative liberty and fly! For mine, I used a variety of materials: white foam for the ghosts, scrapbook paper backed with foam board for the pumpkins, and a weird almost water-proof paper that came with a vodka junk mail thing for my bats. I also reused a bow that came with a gift. I free-hand drew all three things and used a hot glue gun to glue them on the wreath.
Here's where you can take creative liberty and fly! For mine, I used a variety of materials: white foam for the ghosts, scrapbook paper backed with foam board for the pumpkins, and a weird almost water-proof paper that came with a vodka junk mail thing for my bats. I also reused a bow that came with a gift. I free-hand drew all three things and used a hot glue gun to glue them on the wreath.
This is such a cute project!
ReplyDeleteThat's really cute. I'll have to try that will all the bottle caps I've got around here.
ReplyDelete